$$Bcm59 Prisoner Count: B-0 W-0
$$ ---------------------------------------
$$ | . . . . . . . . . . . . . . . . . . . |
$$ | . . . . . . . . . . . . . . . . . . . |
$$ | . . . . O X . . . . . . . O . O O O . |
$$ | . . . O . X . . . X . . . . X X X O . |
$$ | . . . . . . . . . . . . X . . . X X . |
$$ | . . O . . . . . . . . . . . . . O . . |
$$ | . . . 1 . . . . . . . . . . . . . . . |
$$ | . . X O . . . . . . . . . . . . . . . |
$$ | . . . . . . . . . . . . . . . X . . . |
$$ | . . X O . . . . . , O . X . . , X . . |
$$ | . . X . X . . . . . . . X O O O X . . |
$$ | . . . . . . . . . . . O O X X O O . . |
$$ | . . O . . . . . . . . . . O X O X O . |
$$ | . . . . . . . . . . . . . O X X X X . |
$$ | . . . . . . . . . . . . O X . . . . . |
$$ | . . . O . . . . . , . . . . . X . . . |
$$ | . . . . . . . . . . O . . O . . X . . |
$$ | . . . . . . . . . . . . . . . O . . . |
$$ | . . . . . . . . . . . . . . . . . . . |
$$ ---------------------------------------
$$ ---------------------------------------
$$ | . . . . . . . . . . . . . . . . . . . |
$$ | . . . . . . . . . . . . . . . . . . . |
$$ | . . . . O X . . . . . . . O . O O O . |
$$ | . . . O . X . . . X . . . . X X X O . |
$$ | . . . . . . . . . . . . X . . . X X . |
$$ | . . O . . . . . . . . . . . . . O . . |
$$ | . . . 1 . . . . . . . . . . . . . . . |
$$ | . . X O . . . . . . . . . . . . . . . |
$$ | . . . . . . . . . . . . . . . X . . . |
$$ | . . X O . . . . . , O . X . . , X . . |
$$ | . . X . X . . . . . . . X O O O X . . |
$$ | . . . . . . . . . . . O O X X O O . . |
$$ | . . O . . . . . . . . . . O X O X O . |
$$ | . . . . . . . . . . . . . O X X X X . |
$$ | . . . . . . . . . . . . O X . . . . . |
$$ | . . . O . . . . . , . . . . . X . . . |
$$ | . . . . . . . . . . O . . O . . X . . |
$$ | . . . . . . . . . . . . . . . O . . . |
$$ | . . . . . . . . . . . . . . . . . . . |
$$ ---------------------------------------
- Click Here To Show Diagram Code
[go]$$Bcm59 Prisoner Count: B-0 W-0

$$ ---------------------------------------

$$ | . . . . . . . . . . . . . . . . . . . |

$$ | . . . . . . . . . . . . . . . . . . . |

$$ | . . . . O X . . . . . . . O . O O O . |

$$ | . . . O . X . . . X . . . . X X X O . |

$$ | . . . . . . . . . . . . X . . . X X . |

$$ | . . O . . . . . . . . . . . . . O . . |

$$ | . . . 1 . . . . . . . . . . . . . . . |

$$ | . . X O . . . . . . . . . . . . . . . |

$$ | . . . . . . . . . . . . . . . X . . . |

$$ | . . X O . . . . . , O . X . . , X . . |

$$ | . . X . X . . . . . . . X O O O X . . |

$$ | . . . . . . . . . . . O O X X O O . . |

$$ | . . O . . . . . . . . . . O X O X O . |

$$ | . . . . . . . . . . . . . O X X X X . |

$$ | . . . . . . . . . . . . O X . . . . . |

$$ | . . . O . . . . . , . . . . . X . . . |

$$ | . . . . . . . . . . O . . O . . X . . |

$$ | . . . . . . . . . . . . . . . O . . . |

$$ | . . . . . . . . . . . . . . . . . . . |

$$ ---------------------------------------[/go]
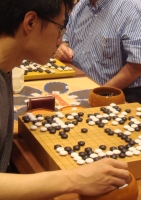
My first reaction was that, since white has neglected to push and cut, I should solidly connect at D9. I still think this would be OK - but I think this is better (it does after all follow the proverb about how to respond to an attachment). By taking a liberty away from white, things can now get tough for him if he pushes and cuts now - whichever cut he chooses, D11 is double atari, and settles me nicely whichever capture I get to make. For this reason, I conclude that this hane is better than immediately connecting - I can always connect later if nothing better presents itself.
If he crosscuts straight away, I also get to capture something. So I expect to see a connection at D11 or extension to E12, but either way I think I can still cause him problems, especially since my stones are now getting close to his corner (and perhaps even, in some lines, getting close to connecting to my group on top).
There is a lot going on here, too much for me to read everything - but last time we had a contact fight, over on the other side of the board, I came out well, so I can hope for more of the same