It is currently Wed Apr 17, 2024 7:42 pm

All times are UTC - 8 hours [ DST ]


Post new topic Reply to topic  [ 91 posts ]  Go to page Previous  1, 2, 3, 4, 5  Next
Author Message
Offline
 Post subject: Re: #250 amatterof v. Joaz Banbeck
Post #21 Posted: Sun Jan 25, 2015 3:00 pm 
Gosei
User avatar

Posts: 1378
Location: wHam!lton, Aotearoa
Liked others: 253
Was liked: 105

Attachment:
cf.sgf [2.41 KiB]
Downloaded 762 times


To elucidate, in our game white got both desirable directions.

_________________
Revisiting Go - Study Journal
My Programming Blog - About the evolution of my go bot.

Top
 Profile  
 
Offline
 Post subject:
Post #22 Posted: Sun Jan 25, 2015 4:17 pm 
Honinbo
User avatar

Posts: 8859
Location: Santa Barbara, CA
Liked others: 349
Was liked: 2076
GD Posts: 312
Hi Bill, :)
Thanks.
Bill Spight wrote:
Click Here To Show Diagram Code
[go]$$Wm7
$$ . . . . . . . . . . . |
$$ . . . . . . . 1 . . . |
$$ . . . . . 4 . . . . . |
$$ . , . . 3 2 . X 5 . . |
$$ . . X . . O . . 6 . . |
$$ . . . . . . . . . . . |
$$ . . . . . . . . . . . |
$$ -----------------------[/go]
The mistake seems to be the attach :w11: , in the original var.

The :w1: attach is for this kind of situation, when B cannot hane at (a) (and can only atari (b) ):
Click Here To Show Diagram Code
[go]$$W
$$ . . . . . . . . . . . |
$$ . . . . . . . O . . . |
$$ . . . . . . . . . . . |
$$ . , . . O X . X 1 . . |
$$ . . . X X O b . a . . |
$$ . . . . . . . . . . . |
$$ . . . . . . . . . . . |
$$ -----------------------[/go]

After the hane :b6: , then even with the simple :b8: atari, B gets a good local result:
Click Here To Show Diagram Code
[go]$$W
$$ . . . . . . . . . . . |
$$ . . . . . . . 1 . . . |
$$ . . . . . 4 . . 7 . . |
$$ . , . . 3 2 . X 5 . . |
$$ . . X . . O 8 . 6 . . |
$$ . . . . . . . . . . . |
$$ . . . . . . . . . . . |
$$ -----------------------[/go]

So in the original var, both the attach :w11: and the immediate tiger's mouth :b12: were mistakes:
Quote:
Click Here To Show Diagram Code
[go]$$Wm7
$$ . . . . . . . . . . . |
$$ . . . . . . . 1 . . . |
$$ . . . . . 4 . . . . . |
$$ . , . . 3 2 . X 5 . . |
$$ . . X . 8 O 6 . 7 . . |
$$ . . . . . . . . . . . |
$$ . . . . . . . . . . . |
$$ -----------------------[/go]
Instead of the attach, W should jump to 3-3 with :w5: :
Click Here To Show Diagram Code
[go]$$W
$$ . . . . . . . . . . . |
$$ . . . . . . . 1 . . . |
$$ . . . . . 4 . . . . . |
$$ . , . . 3 2 . X . . . |
$$ . . X . . O . . 5 . . |
$$ . . . . . . . . . . . |
$$ . . . . . . . . . . . |
$$ -----------------------[/go]

Top
 Profile  
 
Offline
 Post subject: Re: #250 amatterof v. Joaz Banbeck
Post #23 Posted: Sun Jan 25, 2015 4:57 pm 
Dies with sente

Posts: 85
Liked others: 2
Was liked: 14
I'm very curious what Ed and Bill are debating so much, but if I'm lucky, they've noticed that I keep switching the move orders around in my diagrams for the lower left, and saying inconsistent things about the D7-E6 exchange. The reason for this is simply that I don't know these joseki terribly well. It's a bit frustrating, because I feel like I need to know them and many other things better in order to break through my current wall (which is why I called my study journal "Filling in the Gaps").

I'm adding these joseki to the long list of things I need to study, but for now (and mostly for my own reference), here is my scratchpad board trying to reason out which sequences are joseki and what the proper move orders are: http://eidogo.com/#2vEvV2PQ9 Hopefully when the game is over, I can come back here and learn something. :-)

Top
 Profile  
 
Offline
 Post subject: Re: #250 amatterof v. Joaz Banbeck
Post #24 Posted: Sun Jan 25, 2015 6:17 pm 
Honinbo

Posts: 10905
Liked others: 3651
Was liked: 3374
Hi, Ed. :)

Click Here To Show Diagram Code
[go]$$Wc
$$ . . . . . . . . . . . |
$$ . . . . . . . 1 . . . |
$$ . . . . . 4 . . . . . |
$$ . , . . 3 2 . X 6 . . |
$$ . . X . 8 O . 7 5 . . |
$$ . . . . . . . . . . . |
$$ . . . . . . . . . . . |
$$ -----------------------[/go]


I don't think that :w5: is good, because of :b8:.
I have no reference that says that :w1: is joseki.

_________________
The Adkins Principle:
At some point, doesn't thinking have to go on?
— Winona Adkins

Visualize whirled peas.

Everything with love. Stay safe.

Top
 Profile  
 
Offline
 Post subject: Re: #250 amatterof v. Joaz Banbeck
Post #25 Posted: Mon Jan 26, 2015 12:33 am 
Judan
User avatar

Posts: 5539
Location: Banbeck Vale
Liked others: 1103
Was liked: 1456
Rank: 1D AGA
GD Posts: 1512
Kaya handle: Test
For reasons described earlier...


Click Here To Show Diagram Code
[go]$$Wc
$$ ---------------------------------------
$$ | . . . . . . . . . . . . . . . . . . . |
$$ | . . . . . . . . . . . . . . . . . . . |
$$ | . . . 1 . . . . . . . . . . . . . . . |
$$ | . . . , . . . . . , . . . . . X . . . |
$$ | . . . . . . . . . . . . . . . . . . . |
$$ | . . 5 . . . . . . . . . . . . . . . . |
$$ | . . . . . . . . . . . . . . . . . . . |
$$ | . . . . . . . . . . . . . . . . . . . |
$$ | . . . . . . . . . . . . . . . . . . . |
$$ | . . . , . . . . . 6 . . . . . , . . . |
$$ | . . 4 . . . . . . . . . . . . . . . . |
$$ | . . . . . . . . . . . . . . . . . . . |
$$ | . . . . . . . . . . . . . . . . . . . |
$$ | . . 3 . . . . . . . . . . . . . . . . |
$$ | . . . . . 8 . . . . . . . . . . . . . |
$$ | . . . X . 7 . . . , . . . . . 2 . . . |
$$ | . . . . . . . . . . . . . . . . . . . |
$$ | . . . . . . . . . . . . . . . . . . . |
$$ | . . . . . . . . . . . . . . . . . . . |
$$ ---------------------------------------[/go]


Trigger:
Click Here To Show Diagram Code
[go]$$Wc
$$ ---------------------------------------
$$ | . . . . . . . . . . . . . . . . . . . |
$$ | . . . . . . . . . . . . . . . . . . . |
$$ | . . . 1 . . . . . . . . . . . . . . . |
$$ | . . . , . . . . . , . . . . . X . . . |
$$ | . . . . . . . . . . . . . . . . . . . |
$$ | . . 5 . . . . . . . . . . . . . . . . |
$$ | . . . . . . . . . . . . . . . . . . . |
$$ | . . . . . . . . . . . . . . . . . . . |
$$ | . . . . . . . . . . . . . . . . . . . |
$$ | . . . , . . . . . 6 . . . . . , . . . |
$$ | . . 4 . . . . . . . . . . . . . . . . |
$$ | . . . . . . . . . . . . . . . . . . . |
$$ | . . . . . . . . . . . . . . . . . . . |
$$ | . . 3 . . . . . . . . . . . . . . . . |
$$ | . . . . 0 8 9 . . . . . . . . . . . . |
$$ | . . . X . 7 . . . , . . . . . 2 . . . |
$$ | . . . . . . . . . . . . . . . . . . . |
$$ | . . . . . . . . . . . . . . . . . . . |
$$ | . . . . . . . . . . . . . . . . . . . |
$$ ---------------------------------------[/go]

_________________
Help make L19 more organized. Make an index: https://lifein19x19.com/viewtopic.php?f=14&t=5207

Top
 Profile  
 
Offline
 Post subject: Re: #250 amatterof v. Joaz Banbeck
Post #26 Posted: Mon Jan 26, 2015 3:15 am 
Judan

Posts: 6725
Location: Cambridge, UK
Liked others: 436
Was liked: 3719
Rank: UK 4 dan
KGS: Uberdude 4d
OGS: Uberdude 7d
Bill:
Bill Spight wrote:

Click Here To Show Diagram Code
[go]$$Wc
$$ . . . . . . . . . . . |
$$ . . . . . . . 1 . . . |
$$ . . . . . 4 . . . . . |
$$ . , . . 3 2 . X 6 . . |
$$ . . X . 8 O . 7 5 . . |
$$ . . . . . . . . . . . |
$$ . . . . . . . . . . . |
$$ -----------------------[/go]


I don't think that :w5: is good, because of :b8:.
I have no reference that says that :w1: is joseki.


Your joseki books are too old! 1 is very common these days, particularly with the resurgence of the 2 space pincer against the inside approach in the orthodox opening, and this high counter pincer is a common choice. However it is far more common for white to immediately play 3-3 (at 5) rather than hane, black blocks from the high stone (at 6) and then white hanes. Black usually takes the bulge point, allowing the atari, but sometimes he does extend and it reverts to the shape above (which continues with white connect, black connect, white 2nd line atari and then take sente). The reason white plays 3-3 before hane is the exchange of hane for extend becomes very bad if you then 3-3 and black takes the bulge point. amatterof was aware of this but thought it was worth it to get the direction he wanted of linking to the 4th line stone, but I disagree with that (and his 4th line stone is not actually connected, black can cut there, and with some power as he has the ladder).


Ed:
Click Here To Show Diagram Code
[go]$$B
$$ . . . . . . . . . . . |
$$ . . . . . . . O . . . |
$$ . . . . . X . . . . . |
$$ . , j . O X . X O . . |
$$ . . X h f O X . O . . |
$$ . . . k g 1 . . . . . |
$$ . . . . . . . . . . . |
$$ -----------------------[/go]

Yes, this 1 is a better shape for black.

Top
 Profile  
 
Offline
 Post subject: Re:
Post #27 Posted: Mon Jan 26, 2015 8:25 am 
Oza

Posts: 2494
Location: DC
Liked others: 157
Was liked: 442
Universal go server handle: skydyr
Online playing schedule: When my wife is out.
EdLee wrote:
amatterof wrote:
if there is anything I can do to make them better/more interesting,
Usually people enjoy it if both sides think they're winning. :)


Or losing. :)

Top
 Profile  
 
Offline
 Post subject: Re: #250 amatterof v. Joaz Banbeck
Post #28 Posted: Mon Jan 26, 2015 8:42 am 
Dies with sente

Posts: 85
Liked others: 2
Was liked: 14
Click Here To Show Diagram Code
[go]$$Wcm9
$$ ---------------------------------------
$$ | . . . . . . . . . . . . . . . . . . . |
$$ | . . . . . . . . . . . . . . . . . . . |
$$ | . . . O . . . . . . . . . . . . . . . |
$$ | . . . , . . . . . , . . . . . X . . . |
$$ | . . . . . . . . . . . . . . . . . . . |
$$ | . . O . . . . . . . . . . . . . . . . |
$$ | . . . . . . . . . . . . . . . . . . . |
$$ | . . . . . . . . . . . . . . . . . . . |
$$ | . . . . . . . . . . . . . . . . . . . |
$$ | . . . , . . . . . X . . . . . , . . . |
$$ | . . X . . . . . . . . . . . . . . . . |
$$ | . . . . . . . . . . . . . . . . . . . |
$$ | . . . . . . . . . . . . . . . . . . . |
$$ | . . O . . . . . . . . . . . . . . . . |
$$ | . . . . 2 X 1 . . . . . . . . . . . . |
$$ | . . . X . O . 3 . , . . . . . X . . . |
$$ | . . . . . . . . . . . . . . . . . . . |
$$ | . . . . . . . . . . . . . . . . . . . |
$$ | . . . . . . . . . . . . . . . . . . . |
$$ ---------------------------------------[/go]


I'm not quite sure what the rules are regarding triggers. To be safe, I'm hitting submit on this post before looking at the trigger, and will edit it with my next move if I hit the trigger.

Edit: Trigger hit.

For observers:
I didn't talk about the potential that Black would still attach on top in any of my previous posts. I knew the possibility existed in the back of my head, and should have guessed that it would happen given :b6:, but for some reason didn't think to analyze it. I'll need to be more careful about covering the universe of possible black plays before deciding on a path in the rest of this game.

Just as I didn't know the 3-3 invasion josekis all that well, I'm not terribly familiar with this one either. First, some basic principles/thoughts: Black's move calls out that White has created 2 groups, and aims to keep them separated. Thus, for purposes of evaluating results here, Black will succeed if he completely kills one group (ie, consolidates the corner and one side); White will succeed if he can make strong groups both on the bottom and in the corner/side; and an even result will likely involve one strong white group in one of those spots, and aji in the other.

Next, possible moves. The hane seems like the obvious choice, but I can see a few other options that might work as well:
Click Here To Show Diagram Code
[go]$$Wc
$$ ---------------------------------------
$$ | . . . . . . . . . . . . . . . . . . . |
$$ | . . . . . . . . . . . . . . . . . . . |
$$ | . . . 1 . . . . . . . . . . . . . . . |
$$ | . . . , . . . . . , . . . . . X . . . |
$$ | . . . . . . . . . . . . . . . . . . . |
$$ | . . 5 . . . . . . . . . . . . . . . . |
$$ | . . . . . . . . . . . . . . . . . . . |
$$ | . . . . . . . . . . . . . . . . . . . |
$$ | . . . . . . . . . . . . . . . . . . . |
$$ | . . . , . . . . . 6 . . . . . , . . . |
$$ | . . 4 . . . . . . . . . . . . . . . . |
$$ | . . . . . . . . . . . . . . . . . . . |
$$ | . . . . . . . . . . . . . . . . . . . |
$$ | . . 3 . . . . . . . . . . . . . . . . |
$$ | . . . . d 8 a . . . . . . . . . . . . |
$$ | . . . X b 7 . . . , . . . . . 2 . . . |
$$ | . . c . . . . . . . . . . . . . . . . |
$$ | . . . . . . . . . . . . . . . . . . . |
$$ | . . . . . . . . . . . . . . . . . . . |
$$ ---------------------------------------[/go]

  • A - The hane makes sense. White's goal is to make two strong groups from his two currently weak ones, and the way to get stronger is to play contact moves.
  • B - This also makes the bottom-side group strong, but it has two related problems. First, it plays into a situation where Black has played a hane at the head of two stones, which is good shape for him and bad shape for me. Second, it starts to damage the corner aji more than I'd like. I need to make my group strong while leaving as much potential in the corner/left side as possible.
  • C - Seems creative and interesting in a let's-be-crazy sort of way, but again seems to only be looking for 1 live group.
  • D - This seems like a gross overplay, particularly since the ladder doesn't work for White.

To try to make this a bit more clear for observers, here are the results I would predict if I tried B or C. Notice also that both are gote for White.
Click Here To Show Diagram Code
[go]$$W Rough Predictions
$$ | . . . , . . . . | . . . , . . .
$$ | . . X . . . . . | . . X . . . .
$$ | . . . . . . . . | . . . . . . .
$$ | . . . . . . . . | . . . . . . .
$$ | . . O . . . . . | . . O . . . .
$$ | . . 7 6 2 X . . | . . . . 8 X .
$$ | . . 5 X 1 O b . | . . 2 X 5 O .
$$ | . . 4 3 8 . . . | . 6 1 3 4 9 .
$$ | . . a 9 0 . . . | . . . . 7 . .
$$ | . . . . . . . . | . . . . . . .
$$ --------------------------------[/go]


Now for my selected move. The obvious Black response is to draw back (I expect this is Joaz's trigger), after which I'll need to decide which way to connect my two stones, the hanging connection (A) or the solid connection (B). (I briefly looked at Black extending to the X spot instead and concluded it would be an overplay. But I didn't spend too much time on it.)
Click Here To Show Diagram Code
[go]$$Wc
$$ ---------------------------------------
$$ | . . . . . . . . . . . . . . . . . . . |
$$ | . . . . . . . . . . . . . . . . . . . |
$$ | . . . O . . . . . . . . . . . . . . . |
$$ | . . . , . . . . . , . . . . . X . . . |
$$ | . . . . . . . . . . . . . . . . . . . |
$$ | . . O . . . . . . . . . . . . . . . . |
$$ | . . . . . . . . . . . . . . . . . . . |
$$ | . . . . . . . . . . . . . . . . . . . |
$$ | . . . . . . . . . . . . . . . . . . . |
$$ | . . . , . . . . . X . . . . . , . . . |
$$ | . . X . . . . . . . . . . . . . . . . |
$$ | . . . . . . . . . . . . . . . . . . . |
$$ | . . . . . . . . . . . . . . . . . . . |
$$ | . . O . . x . . . . . . . . . . . . . |
$$ | . . . . 2 X 1 . . . . . . . . . . . . |
$$ | . . . X . O b a . , . . . . . X . . . |
$$ | . . . . . . . . . . . . . . . . . . . |
$$ | . . . . . . . . . . . . . . . . . . . |
$$ | . . . . . . . . . . . . . . . . . . . |
$$ ---------------------------------------[/go]


The advantage to A is that it works better when Black tries to build up the middle and use his tengen stone, like so:
Click Here To Show Diagram Code
[go]$$Wc
$$ ---------------------------------------
$$ | . . . . . . . . . . . . . . . . . . . |
$$ | . . . . . . . . . . . . . . . . . . . |
$$ | . . . O . . . . . . . . . . . . . . . |
$$ | . . . , . . . . . , . . . . . X . . . |
$$ | . . . . . . . . . . . . . . . . . . . |
$$ | . . O . . . . . . . . . . . . . . . . |
$$ | . . . . . . . . . . . . . . . . . . . |
$$ | . . . . . . . . . . . . . . . . . . . |
$$ | . . . . . . . . . . . . . . . . . . . |
$$ | . . . , . . . . . X . . . . . , . . . |
$$ | . . X . . . . . . . . . . . . . . . . |
$$ | . . . . . . . . . . . . . . . . . . . |
$$ | . . . . . . . 6 . . . . . . . . . . . |
$$ | . . O . . . 4 5 . . . . . . . . . . . |
$$ | . . . . 2 X 1 . . . . . . . . . . . . |
$$ | . . . X . O . 3 . , . . . . . X . . . |
$$ | . . . . . . . . . . . . . . . . . . . |
$$ | . . . . . . . . . . . . . . . . . . . |
$$ | . . . . . . . . . . . . . . . . . . . |
$$ ---------------------------------------[/go]

If I had played the solid connection instead, :b6: would be a more powerful move, aiming to consolidate the left side and kill C6 on a larger scale. Because of the hanging connection, however, I can also respond strongly and C6 retains most of its aji. In addition, I'll be building some very nice thickness to come to O3.

The advantage of B is that it removes aji along the bottom-side, which, in turn, increases my aji in the corner. With the hanging connection, Black can try to consolidate the corner by poking at White's shape. However, when I studied this, I couldn't find good real way for Black to completely eliminate the corner aji.

So, I guess I'm predicting some sort of development along these lines, which looks OK for White:
Click Here To Show Diagram Code
[go]$$Wc :w9: 
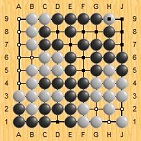
at a or b (probably b)
$$ ---------------------------------------
$$ | . . . . . . . . . . . . . . . . . . . |
$$ | . . . . . . . . . . . . . . . . . . . |
$$ | . . . O . . . . . . . . . . . . . . . |
$$ | . . . , . . . . . , . . . . . X . . . |
$$ | . . . . . . . . . . . . . . . . . . . |
$$ | . . O . . . . . . . . . . . . . . . . |
$$ | . . . . . . . . . . . . . . . . . . . |
$$ | . . . . . . . . . . . . . . . . . . . |
$$ | . . . . . . . . . . . . . . . . . . . |
$$ | . . . , . . . . . X . . . . . , . . . |
$$ | . . X . . . . . . . . . . . . . . . . |
$$ | . . . . . . . . . . . . . . . . . . . |
$$ | . . . . . . 8 . . . . . . . . . . . . |
$$ | . . O . . . 6 7 . . . . . . . . . . . |
$$ | . . . . 2 X 1 . . . . . . . . . . . . |
$$ | . . . X . O . 3 . , . . . . . X . . . |
$$ | . . a . 4 5 . . . . . . . b . . . . . |
$$ | . . . . . . . . . . . . . . . . . . . |
$$ | . . . . . . . . . . . . . . . . . . . |
$$ ---------------------------------------[/go]

Or maybe:
Click Here To Show Diagram Code
[go]$$Wc Still plenty of aji left in C6. Will Black have time to play A?
$$ ---------------------------------------
$$ | . . . . . . . . . . . . . . . . . . . |
$$ | . . . . . . . . . . . . . . . . . . . |
$$ | . . . O . . . . . . . . . . . . . . . |
$$ | . . . , . . . . . , . . . . . X . . . |
$$ | . . . . . . . . . . . . . . . . . . . |
$$ | . . O . . . . . . . . . . . . . . . . |
$$ | . . . . . . . . . . . . . . . . . . . |
$$ | . . . . . . . . . . . . . . . . . . . |
$$ | . . . . . . . . . . . . . . . . . . . |
$$ | . . . , . . . . . X . . . . . , . . . |
$$ | . . X . . . . . . . . . . . . . . . . |
$$ | . . . ? . . . . . . . . . . . . . . . |
$$ | . . . a ? . ? . . . . . . . . . . . . |
$$ | . . O . . . . . . . . . . . . . . . . |
$$ | . . . . 2 X 1 . . . . . . . . . . . . |
$$ | . ? . X . O . 3 . , . . . . . X . . . |
$$ | . . . . 6 4 5 . . . . . . 7 . . . . . |
$$ | . . . . . . . . . . . . . . . . . . . |
$$ | . . . . . . . . . . . . . . . . . . . |
$$ ---------------------------------------[/go]

If :b4: peeps at G3, it's pretty annoying though, and I'm still working on the best response there.


For observers (regarding the trigger):
At least I'm not completely off track. Also glad to see I was right in not spending too much time looking at :b10: at F6.

The hanging connection still seems like the right plan. Now to see how Black tries to erase the C3 and C6 aji.

As a side note, I'm very happy that I have C14 in place. Even if Black builds lots of thickness, that stone is working beautifully to prevent Black from developing something really scary.

Top
 Profile  
 
Offline
 Post subject: Re: #250 amatterof v. Joaz Banbeck
Post #29 Posted: Mon Jan 26, 2015 10:27 am 
Honinbo

Posts: 10905
Liked others: 3651
Was liked: 3374
Thanks, Uberdude! :)

Uberdude wrote:
Your joseki books are too old!


And here I was just getting into the joseki of the 1830s. :mrgreen:

_________________
The Adkins Principle:
At some point, doesn't thinking have to go on?
— Winona Adkins

Visualize whirled peas.

Everything with love. Stay safe.

Top
 Profile  
 
Offline
 Post subject: Re: #250 amatterof v. Joaz Banbeck
Post #30 Posted: Mon Jan 26, 2015 11:46 am 
Judan
User avatar

Posts: 5539
Location: Banbeck Vale
Liked others: 1103
Was liked: 1456
Rank: 1D AGA
GD Posts: 1512
Kaya handle: Test
@amatterof: Your handling of the trigger looks fine to me.


Bill Spight wrote:
Thanks, Uberdude! :)

Uberdude wrote:
Your joseki books are too old!


And here I was just getting into the joseki of the 1830s. :mrgreen:


I can't wait to go back and look at the comments.

@everyone except amatterof: If we reach the point where the comments are not affecting the current game, please go back and unhide them. Thanks.

_________________
Help make L19 more organized. Make an index: https://lifein19x19.com/viewtopic.php?f=14&t=5207

Top
 Profile  
 
Offline
 Post subject: Re: #250 amatterof v. Joaz Banbeck
Post #31 Posted: Mon Jan 26, 2015 4:16 pm 
Judan

Posts: 6725
Location: Cambridge, UK
Liked others: 436
Was liked: 3719
Rank: UK 4 dan
KGS: Uberdude 4d
OGS: Uberdude 7d
Well, we were talking about a joseki which can't happen anymore in this corner (as you played f5), but maybe it could happen in those other 4-4 corners...

Top
 Profile  
 
Offline
 Post subject: Re: #250 amatterof v. Joaz Banbeck
Post #32 Posted: Mon Jan 26, 2015 6:45 pm 
Judan
User avatar

Posts: 5539
Location: Banbeck Vale
Liked others: 1103
Was liked: 1456
Rank: 1D AGA
GD Posts: 1512
Kaya handle: Test
Joaz Banbeck almost wrote:
... he has few reasonable options but to play...like this:

Click Here To Show Diagram Code
[go]$$Bc
$$ | . . . , . . . . . X . . . . . , . . . |
$$ | . . X . . . . . . . . . . . . . . . . |
$$ | . . . . . . . . . . . . . . . . . . . |
$$ | . . . . . . . . . . . . . . . . . . . |
$$ | . . O . . . . . . . . . . . . . . . . |
$$ | . . . . 3 1 2 . . . . . . . . . . . . |
$$ | . . . X . O . . . , . . . . . X . . . |
$$ | . . 4 . . . . . . . . . . . . . . . . |
$$ | . . . . . . . . . . . . . . . . . . . |
$$ | . . . . . . . . . . . . . . . . . . . |
$$ ---------------------------------------[/go]

...

amatterof almost wrote:
...

Click Here To Show Diagram Code
[go]$$Bc
$$ | . . X . . . . . . . . . . . . . . . . |
$$ | . . . . . . . . . . . . . . . . . . . |
$$ | . . . . . . . . . . . . . . . . . . . |
$$ | . . O . . . . . . . . . . . . . . . . |
$$ | . . . . 3 1 2 . . . . . . . . . . . . |
$$ | . . . X . O . 4 . , . . . . . X . . . |
$$ | . . . . . . . . . . . . . . . . . . . |
$$ | . . . . . . . . . . . . . . . . . . . |
$$ | . . . . . . . . . . . . . . . . . . . |
$$ ---------------------------------------[/go]


...

I thought that he had to take the corner.

:scratch: :scratch: :scratch: :scratch: :scratch: :scratch:

But, as I said earlier, I'm out of my book.

_________________
Help make L19 more organized. Make an index: https://lifein19x19.com/viewtopic.php?f=14&t=5207

Top
 Profile  
 
Offline
 Post subject: Re: #250 amatterof v. Joaz Banbeck
Post #33 Posted: Mon Jan 26, 2015 11:25 pm 
Judan
User avatar

Posts: 5539
Location: Banbeck Vale
Liked others: 1103
Was liked: 1456
Rank: 1D AGA
GD Posts: 1512
Kaya handle: Test
Click Here To Show Diagram Code
[go]$$Wcm11
$$ --------------------------------
$$ | . . . . . . . . . . . . . . . . . . . |
$$ | . . . . . . . . . . . . . . . . . . . |
$$ | . . . O . . . . . . . . . . . . . . . |
$$ | . . . , . . . . . , . . . . . X . . . |
$$ | . . . . . . . . . . . . . . . . . . . |
$$ | . . O . . . . . . . . . . . . . . . . |
$$ | . . . . . . . . . . . . . . . . . . . |
$$ | . . . . . . . . . . . . . . . . . . . |
$$ | . . . . . . . . . . . . . . . . . . . |
$$ | . . . , . . . . . X . . . . . , . . . |
$$ | . . X . . . . . . . . . . . . . . . . |
$$ | . . . . . . . . . . . . . . . . . . . |
$$ | . . . . . . . . . . . . . . . . . . . |
$$ | . . O . . . . . . . . . . . . . . . . |
$$ | . . . . X X O . . . . . . . . . . . . |
$$ | . . . X . O . 1 . , . . . . . X . . . |
$$ | . . 2 . . . . . . . . . . . . . . . . |
$$ | . . . . . . . . . . . . . . . . . . . |
$$ | . . . . . . . . . . . . . . . . . . . |
$$ ---------------------------------------[/go]

Let us assume that I do something moderately aggressive, that restricts his growing group. Even then, he can invade

I can block this way:

Click Here To Show Diagram Code
[go]$$Wc
$$ ---------------------------------------
$$ | . . . . . . . . . . . . . . . . . . . |
$$ | . . . . . . . . . . . . . . . . . . . |
$$ | . . . O . . . . . . . . . . . . . . . |
$$ | . . . , . . . . . , . . . . . X . . . |
$$ | . . . . . . . . . . . . . . . . . . . |
$$ | . . O . . . . . . . . . . . . . . . . |
$$ | . . . . . . . . . . . . . . . . . . . |
$$ | . . . . . . . . . . . . . . . . . . . |
$$ | . . . . . . . . . . . . . . . . . . . |
$$ | . . . , . . . . . X . . . . . , . . . |
$$ | . . X . . . . . . . . . . . . . . . . |
$$ | . . . . . . . . . . . . . . . . . . . |
$$ | . . . . . 4 . 5 . . . . . . . . . . . |
$$ | . . O . . . . . . . . . . . . . . . . |
$$ | . . . . X X O . . . . . . . . . . . . |
$$ | . . 3 X . O . O . B . . . . . X . . . |
$$ | . . 1 2 . . . . . . . . . . . . . . . |
$$ | . . . . . . . . . . . . . . . . . . . |
$$ | . . . . . . . . . . . . . . . . . . . |
$$ ---------------------------------------[/go]


...and my lower left group is meaningless, maybe even in danger.

Or I can block this way:

Click Here To Show Diagram Code
[go]$$Wc
$$ ---------------------------------------
$$ | . . . . . . . . . . . . . . . . . . . |
$$ | . . . . . . . . . . . . . . . . . . . |
$$ | . . . O . . . . . . . . . . . . . . . |
$$ | . . . , . . . . . , . . . . . X . . . |
$$ | . . . . . . . . . . . . . . . . . . . |
$$ | . . O . . . . . . . . . . . . . . . . |
$$ | . . . . . . . . . . . . . . . . . . . |
$$ | . . . . . . . . . . . . . . . . . . . |
$$ | . . . . . . . . . . . . . . . . . . . |
$$ | . . . , . . . . . X . . . . . , . . . |
$$ | . . X . . . . . . . . . . . . . . . . |
$$ | . . . . . . . . . . . . . . . . . . . |
$$ | . . . . . . . . . . . . . . . . . . . |
$$ | . . O . . . . . . . . . . . . . . . . |
$$ | . . . . X X O . . . . . . . . . . . . |
$$ | . . 2 X . O . O . B . . . . . X . . . |
$$ | . . 1 3 . . . . . . . . . . . . . . . |
$$ | . . . . . . . . . . . . . . . . . . . |
$$ | . . . . . . . . . . . . . . . . . . . |
$$ ---------------------------------------[/go]


..and he is in a better position than the joseki because his worst weak spot is now protected.

He can take it profitably if I let him, and after all, it is a corner, so I should get it for myself.

But then, he has sente. What is the worst that he can do?

He probably has to make some sort of base for his group.

He can't go as far as N3:

Click Here To Show Diagram Code
[go]$$Wcm11
$$ | . . . . . . . . . . . . . . . . . . . |
$$ | . . . , . . . . . X . . . . . , . . . |
$$ | . . X . . . . . . . . . . . . . . . . |
$$ | . . . . . . . . . . . . . . . . . . . |
$$ | . . . . . . . . . . . . . . . . . . . |
$$ | . . O . . . . . . . . . . . . . . . . |
$$ | . . . . X X O . . . . . . . . . . . . |
$$ | . . . X . O . 1 . 4 . . . . . X . . . |
$$ | . . 2 . . . . . . . . . 3 . . . . . . |
$$ | . . . . . . . . . . . . . . . . . . . |
$$ | . . . . . . . . . . . . . . . . . . . |
$$ ---------------------------------------[/go]


So the most he can do is this:

Click Here To Show Diagram Code
[go]$$Wcm11
$$ | . . . . . . . . . . . . . . . . . . . |
$$ | . . . , . . . . . X . . . . . , . . . |
$$ | . . X . . . . . . . . . . . . . . . . |
$$ | . . . . . . . . . . . . . . . . . . . |
$$ | . . . . . . . . . . . . . . . . . . . |
$$ | . . O . . . . . . . . . . . . . . . . |
$$ | . . . . X X O . . . . . . . . . . . . |
$$ | . . . X . O . 1 . , . . . . . X . . . |
$$ | . . 2 . . . . . . . . 3 . 4 . . . . . |
$$ | . . . . . . . . . . . . . . . . . . . |
$$ | . . . . . . . . . . . . . . . . . . . |
$$ ---------------------------------------[/go]


...and then I get the natural play at 14.

Or, if he tenukis:

Click Here To Show Diagram Code
[go]$$Wcm11 3 elsewhere
$$ | . . . . . . . . . . . . . . . . . . . |
$$ | . . . , . . . . . X . . . . . , . . . |
$$ | . . X . . . . . . . . . . . . . . . . |
$$ | . . . . . . . . . . . . . . . . . . . |
$$ | . . . . . . . . . . . . . . . . . . . |
$$ | . . O . . . . . . . . . . . . . . . . |
$$ | . . . . X X O . . . . . . . . . . . . |
$$ | . . . X . O . 1 . 4 . . . . . X . . . |
$$ | . . 2 . . . . . . . . . . . . . . . . |
$$ | . . . . . . . . . . . . . . . . . . . |
$$ | . . . . . . . . . . . . . . . . . . . |
$$ ---------------------------------------[/go]

_________________
Help make L19 more organized. Make an index: https://lifein19x19.com/viewtopic.php?f=14&t=5207

Top
 Profile  
 
Offline
 Post subject: Re: #250 amatterof v. Joaz Banbeck
Post #34 Posted: Tue Jan 27, 2015 4:21 am 
Dies with sente

Posts: 85
Liked others: 2
Was liked: 14
For observers:
I've gone through at least 3 stages of reactions to :b12:.

Stage 1 (Yay!)
My first thought on seeing :b12: was "What strange shape!" Because strange shape, especially early in a game, is usually a sign of a mistake, I considered this an indication that I was starting to catch up from the initial handicap. For about 15 seconds, I was happy.

Stage 2 (All is lost!)
Then I looked at :b12: more and realized that it actually does a lot. First, it completely eliminates all of the corner aji. Second, it also makes the slide to B4 no longer sente. That means there's less aji in the white C6 stone. And with less aji in C6, a black move at D7 looks like it might make a very large and very secure territory. Lastly, :b12: starts staring pretty menacingly at the G3 peep.

At this point, I started looking at what my mistake must have been. I thought perhaps that :w11: should have been at G6 instead, since that would restore at bit more aji to C6. For about 20-30 minutes I was mad at myself for messing up so early and wondering how I was going to claw my way back.

(More on G3 and G6 below)

Stage 3 (Keep going)
Next, I remembered my final prediction diagram in my last post, and realized that this position is not really much different from that one. The differences are:
  • Black's corner is smaller
  • White hasn't fixed his shape with G3
  • The B4 slide is no longer sente
Since I said I was OK with White in that position, why am I not OK with White here too? In that diagram, I had confidently written "Will Black have time to come to [D7]?" and it's still the case here that Black's corner only looks impressive if he later plays this gote (reverse-sente-ish?) move.

The idea that this position could be locally even is something I remember really struggling to grasp as an SDK. It looks like all White has is a few scattered stones on the bottom, while Black is securing point after point in the corner. But, in fact, White has gotten significant compensation, including the shimari in the upper left and sente.

The only reason I think the position looks a bit scary to me is that stupid tengen stone. If it wasn't there, I would be strongly considering pulling out C6 now. But then I have to remember that it's still very early in a handicap game, so of course I feel like I'm slightly trailing. Interestingly, I now mentally regard the tengen stone as Black's handicap stone, rather than one of the corners. Once we're a bit farther along in the fuseki (so that it isn't cheating), I want to make a note to look and see if there are any professional games where White played a shimari with :w2: and :w4:, leaving 3 corners for Black. It seems like a strange but conceivable strategy, and it's effectively the one I guess I've employed here if we consider the tengen stone to be the handicap stone.

Notes on G3
Finally, a few words about the G3 peep. Before :b12:, I was struggling to come up with a good answer to this peep, because I wanted to make sure I still left aji in the corner. Thus, my two options were:
Click Here To Show Diagram Code
[go]$$Bm12
$$ | . . . , . . . . .
$$ | . . X . . . . . .
$$ | . . . . . . . . .
$$ | . . . . . . . . .
$$ | . . O . . . . . .
$$ | . . . . X X O . .
$$ | . . . X . O a O .
$$ | . . . . . b B . .
$$ | . . . . . . . . .
$$ | . . . . . . . . .
$$ ------------------[/go]

My first instinct was B, but there's actually a possible trick there that White can fall into.
Click Here To Show Diagram Code
[go]$$W Black takes the center
$$ | . . . , . . . . .
$$ | . . X . . . . . .
$$ | . . . . . . . . .
$$ | . . . . . . . . .
$$ | . . O . . . 4 6 .
$$ | . . . . X X O 5 .
$$ | . . . X . O 2 O .
$$ | . . . . . 1 B . .
$$ | . . . . . . 3 . .
$$ | . . . . . . . . .
$$ ------------------[/go]

Now :b2: is a wonderful sacrifice allowing Black to seal off the center and make his tengen stone shine.

However, now that Black has played C3, there's very little point in keeping an eye on the corner, which means that I can consider this response to continue building up the bottom:
Click Here To Show Diagram Code
[go]$$Bm12
$$ | . . . , . . . . .
$$ | . . X . . . . . .
$$ | . . . . . . . . .
$$ | . . . . . . . . .
$$ | . . O . . . a b .
$$ | . . . . X X O . .
$$ | . . . X . O . O .
$$ | . . 1 . . . B W .
$$ | . . . . . . . . .
$$ | . . . . . . . . .
$$ ------------------[/go]

There is still an annoying defect at A (which makes me still wonder if :w11: wasn't a mistake and should be here), but I can at least respond at B now, since the F4 stone has lost a lot of its value and letting Black cut it off isn't the worst thing in the world at this early stage.

In short, maybe :w11: was a mistake, and maybe :b12: is the punishment. Or maybe they're both mistakes. I don't know. Can someone call up Iyama Yuta and ask?

Top
 Profile  
 
Offline
 Post subject: Re: #250 amatterof v. Joaz Banbeck
Post #35 Posted: Tue Jan 27, 2015 5:04 am 
Judan

Posts: 6725
Location: Cambridge, UK
Liked others: 436
Was liked: 3719
Rank: UK 4 dan
KGS: Uberdude 4d
OGS: Uberdude 7d
@amatterof
So you didn't think about taking 3-3 for yourself last move then? That's a common idea with double approaches.

Top
 Profile  
 
Offline
 Post subject: Re: #250 amatterof v. Joaz Banbeck
Post #36 Posted: Tue Jan 27, 2015 7:21 am 
Dies with sente

Posts: 85
Liked others: 2
Was liked: 14
@Uberdude:
I considered it very briefly, but instinctively thought that if I was going to invade, it would have been better not to have made the marked exchange first. I didn't play these out until now, but here are two examples:

Click Here To Show Diagram Code
[go]$$Wc Example 1: :w5:, :w9:, or :b10: could be A
$$ ---------------------------------------
$$ | . . . . . . . . . . . . . . . . . . . |
$$ | . . . . . . . . . . . . . . . . . . . |
$$ | . . . O . . . . . . . . . . . . . . . |
$$ | . . . , . . . . . , . . . . . X . . . |
$$ | . . . . . . . . . . . . . . . . . . . |
$$ | . . O . . . . . . . . . . . . . . . . |
$$ | . . . . . . . . . . . . . . . . . . . |
$$ | . . . . . . . . . . . . . . . . . . . |
$$ | . . . . . . . . . . . . . . . . . . . |
$$ | . . . , . . . . . X . . . . . , . . . |
$$ | . . X . . . . . . . . . . . . . . . . |
$$ | . . . . . . . . . . . . . . . . . . . |
$$ | . . . . . . . . . . . . . . . . . . . |
$$ | . . O . . . . . . . . . . . . . . . . |
$$ | . 6 8 . B X W . . . . . . . . . . . . |
$$ | . 5 2 X . O 4 0 . , . . . . . X . . . |
$$ | . 7 1 3 . 9 a . . . . . . . . . . . . |
$$ | . . . . . . . . . . . . . . . . . . . |
$$ | . . . . . . . . . . . . . . . . . . . |
$$ ---------------------------------------[/go]


Click Here To Show Diagram Code
[go]$$Wc Example 2: White can play A, so it's probably ok
$$ ---------------------------------------
$$ | . . . . . . . . . . . . . . . . . . . |
$$ | . . . . . . . . . . . . . . . . . . . |
$$ | . . . O . . . . . . . . . . . . . . . |
$$ | . . . , . . . . . , . . . . . X . . . |
$$ | . . . . . . . . . . . . . . . . . . . |
$$ | . . O . . . . . . . . . . . . . . . . |
$$ | . . . . . . . . . . . . . . . . . . . |
$$ | . . . . . . . . . . . . . . . . . . . |
$$ | . . . . . . . . . . . . . . . . . . . |
$$ | . . . , . . . . . X . . . . . , . . . |
$$ | . . X . . . . . . . . . . . . . . . . |
$$ | . . . . . . . . . . . . . . . . . . . |
$$ | . . . . . . . . . . . . . . . . . . . |
$$ | . . O . . . a . . . . . . . . . . . . |
$$ | . . . . B X W . . . . . . . . . . . . |
$$ | . . 3 X . O . . . . . . . . . X . . . |
$$ | . . 1 2 . . . . . . . . . . . . . . . |
$$ | . 5 4 6 . . . . . . . . . . . . . . . |
$$ | . . . . . . . . . . . . . . . . . . . |
$$ ---------------------------------------[/go]


But maybe you're thinking of this complicated idea:
Click Here To Show Diagram Code
[go]$$Wc Complicated
$$ ---------------------------------------
$$ | . . . . . . . . . . . . . . . . . . . |
$$ | . . . . . . . . . . . . . . . . . . . |
$$ | . . . O . . . . . . . . . . . . . . . |
$$ | . . . , . . . . . , . . . . . X . . . |
$$ | . . . . . . . . . . . . . . . . . . . |
$$ | . . O . . . . . . . . . . . . . . . . |
$$ | . . . . . . . . . . . . . . . . . . . |
$$ | . . . . . . . . . . . . . . . . . . . |
$$ | . . . . . . . . . . . . . . . . . . . |
$$ | . . . , . . . . . X . . . . . , . . . |
$$ | . . X . . . . . . . . . . . . . . . . |
$$ | . . . . . . . . . . . . . . . . . . . |
$$ | . . . . d . . . . . . . . . . . . . . |
$$ | . . O b . a . . . . . . . . . . . . . |
$$ | . . c 9 B X W . . . . . . . . . . . . |
$$ | . . 2 X 5 O 7 . . , . . . . . X . . . |
$$ | . 8 1 3 4 6 . . . . . . . . . . . . . |
$$ | . . 0 . . . . . . . . . . . . . . . . |
$$ | . . . . . . . . . . . . . . . . . . . |
$$ ---------------------------------------[/go]

The marked exchange means Black gets to play atari at :b6:, but after White at A, White does end up nicely thick. But what if :b10: is at B? The C9 stone is an annoying ladder breaker.
Even :b10: at c followed by b and d looks tricky. Is there a ko in the corner? (I looked at a closely related variation for awhile while studying the G3 peep before :b12:).

Top
 Profile  
 
Offline
 Post subject: Re: #250 amatterof v. Joaz Banbeck
Post #37 Posted: Tue Jan 27, 2015 7:51 am 
Dies with sente

Posts: 85
Liked others: 2
Was liked: 14
Click Here To Show Diagram Code
[go]$$Wcm11
$$ --------------------------------
$$ | . . . . . . . . . . . . . . . . . . . |
$$ | . . . . . . . . . . . . . . . . . . . |
$$ | . . . O . . . . . . . . . . . . . . . |
$$ | . . . , . . . . . , . . . . . X . . . |
$$ | . . . . . . . . . . . . . . . . . . . |
$$ | . . O . . . . . . . . . . . . . . . . |
$$ | . . . . . . . . . . . . . . . . . . . |
$$ | . . . . . . . . . . . . . . . . . . . |
$$ | . . . . . . . . . . . . . . . . . . . |
$$ | . . . , . . . . . X . . . . . , . . . |
$$ | . . X . . . . . . . . . . . . . . . . |
$$ | . . . . . . . . . . . . . . . . . . . |
$$ | . . . . . . . . . . . . . . . . . . . |
$$ | . . O . . . . . . . . . . . . . . . . |
$$ | . . . . X X O . . . . . . . . . . . . |
$$ | . . . X . O . 1 . , . . . . . X . . . |
$$ | . . 2 . . . . . . . . . . 3 . . . . . |
$$ | . . . . . . . . . . . . . . . . . . . |
$$ | . . . . . . . . . . . . . . . . . . . |
$$ ---------------------------------------[/go]


The first question I had to ask myself was whether there's anything more I want to do locally in the lower left. For instance, I could:
  • Fix my shape with G3
  • Build more influence/a wall with G6 or G7
  • Activate C6
None of these seem very appealing right now. Fixing my shape with G3 is gote and feels slow. Building a wall with G6 or G7 is nice, but Black will almost certainly take the opportunity to play D7 if I do. And activating C6 seems like I'm begging to be attacked, when even the G5 stones aren't settled.

However, one thing I spent a lot of time thinking about was whether there is some move I can play with C6 that means Black can no longer kill it as cleanly. In other words, before leaving C6, I want to see if there's a way to increase its aji. I looked at the following moves:

Click Here To Show Diagram Code
[go]$$Wcm11
$$ --------------------------------
$$ | . . . . . . . . . . . . . . . . . . . |
$$ | . . . . . . . . . . . . . . . . . . . |
$$ | . . . O . . . . . . . . . . . . . . . |
$$ | . . . , . . . . . , . . . . . X . . . |
$$ | . . . . . . . . . . . . . . . . . . . |
$$ | . . O . . . . . . . . . . . . . . . . |
$$ | . . . . . . . . . . . . . . . . . . . |
$$ | . . . . . . . . . . . . . . . . . . . |
$$ | . . . . . . . . . . . . . . . . . . . |
$$ | . . . , . . . . . X . . . . . , . . . |
$$ | . . X . . . . . . . . . . . . . . . . |
$$ | . . . b d . . . . . . . . . . . . . . |
$$ | . . . a c . . . . . . . . . . . . . . |
$$ | . . O . . . . . . . . . . . . . . . . |
$$ | . . . . X X O . . . . . . . . . . . . |
$$ | . . . X . O . O . , . . . . . X . . . |
$$ | . . X . . . . . . . . . . . . . . . . |
$$ | . . . . . . . . . . . . . . . . . . . |
$$ | . . . . . . . . . . . . . . . . . . . |
$$ ---------------------------------------[/go]

The problem with A, B and C is that they both tend to prompt moves that will later allow Black to capture C6 on an even bigger scale after White tenukis now:
  • For A, Black likely plays F7 or E8, followed by the other one.
  • For B, Black likely plays D9, followed by E8
  • For C, Black likely plays E9, followed by F8
In other words, if I'm going to tenuki anyway, I shouldn't give Black any of these helping moves. D was the only one that looked remotely interesting. Black then plays D7, and there is lots of fun aji remaining around C8. Furthermore, Black's follow-up killing move here is D8, which is slower and no bigger than originally.

I started gearing up to play D, but then realized that (1) while there is still a lot of aji around C8 after this exchange, there is decidedly less aji than there currently is; (2) I can still play at D after Black plays D7; and (3) (most importantly), I may want to provoke Black D7 in a different way later on, such as with G6 or G7 to develop the bottom, or with something around C11 to develop the top. There's no need to commit to a particular path before I know what I want.

So, if I'm going to tenuki, there are 3 options that come to mind:
Click Here To Show Diagram Code
[go]$$Wc
$$ --------------------------------
$$ | . . . . . . . . . . . . . . . . . . . |
$$ | . . . . . . . . . . . . . . . . . . . |
$$ | . . . O . . . . . . . . . a . . . . . |
$$ | . . . , . . . . . , . . . . . X . . . |
$$ | . . . . . . . . . . . . . . . . . . . |
$$ | . . O . . . . . . . . . . . . . . . . |
$$ | . . . . . . . . . . . . . . . . . . . |
$$ | . . . . . . . . . . . . . . . . . . . |
$$ | . . . . . . . . . . . . . . . . . . . |
$$ | . . . , . . . . . X . . . . . , . . . |
$$ | . . X . . . . . . . . . . . . . . . . |
$$ | . . . . . . . . . . . . . . . . . . . |
$$ | . . . . . . . . . . . . . . . . . . . |
$$ | . . O . . . . . . . . . . . . . c . . |
$$ | . . . . X X O . . . . . . . . . . . . |
$$ | . . . X . O . O . , . . . . . X . . . |
$$ | . . X . . . . . . . . . . b . . . . . |
$$ | . . . . . . . . . . . . . . . . . . . |
$$ | . . . . . . . . . . . . . . . . . . . |
$$ ---------------------------------------[/go]


A play at A returns to my original plan of developing the top. B and C, however, are the kind of directional questions with which I still struggle. B seems natural, and if Black calmly extends, I can cash in nicely on the bottom.

Click Here To Show Diagram Code
[go]$$Wc
$$ --------------------------------
$$ | . . . . . . . . . . . . . . . . . . . |
$$ | . . . . . . . . . . . . . . . . . . . |
$$ | . . . O . . . . . . . . . . . . . . . |
$$ | . . . , . . . . . , . . . . . X . . . |
$$ | . . . . . . . . . . . . . . . . . . . |
$$ | . . O . . . . . . . . . . . . . . . . |
$$ | . . . . . . . . . . . . . . . . . . . |
$$ | . . . . . . . . . . . . . . . . . . . |
$$ | . . . . . . . . . . . . . . . . . . . |
$$ | . . . , . . . . . X . . . . . , . . . |
$$ | . . X . . . . . . . . . . . . . . . . |
$$ | . . . . . . . . . . . . . . . . . . . |
$$ | . . . . . . . . . . . . . . . . . . . |
$$ | . . O . . . . . . . . . . . . . 2 . . |
$$ | . . . . X X O . . . . . . . . . . . . |
$$ | . . . X . O . O . , ? ? . . . X . . . |
$$ | . . X . . . . . . . ? . . 1 . . 4 . . |
$$ | . . . . . . . . . . . . . . . 3 . . . |
$$ | . . . . . . . . . . . . . . . . . . . |
$$ ---------------------------------------[/go]


If Black pincers, this time I'm more torn about what to do. The G5 stones are strong enough (especially if I get G3), that I'm not too worried about Black developing something if I take the corner. But doesn't the fact that I'm happy to give Black the bottom seem to suggest that I'm playing in the wrong direction with B in the first place? Or, maybe my direction is correct and it just means this is a good spot to jump out and fight back against a pincer, especially since I can play G6/G7 as a possible dual threat then?

I'm leaning towards the second idea, and this corner feels slightly urgent (unlike A) since G5 isn't perfectly settled, so I'm picking B.

Top
 Profile  
 
Offline
 Post subject: Re: #250 amatterof v. Joaz Banbeck
Post #38 Posted: Tue Jan 27, 2015 9:14 am 
Judan
User avatar

Posts: 5539
Location: Banbeck Vale
Liked others: 1103
Was liked: 1456
Rank: 1D AGA
GD Posts: 1512
Kaya handle: Test
:o

I'm totally confused by my opponent's play. He has only made seven moves, and three of them make no sense to me. Two of those three moves are the last two.

1) C14 seems to be too loose for solid territory as C15 would have been, but it is not quite far enough to prevent a two-space extension for my stone at C9.

2) TTBOMR, he had to invade at C3. I can't claim to understand this. It is just what I recall from my joseki books.

3) His most recent extension seems to be an overplay.

_________________
Help make L19 more organized. Make an index: https://lifein19x19.com/viewtopic.php?f=14&t=5207

Top
 Profile  
 
Offline
 Post subject: Re: #250 amatterof v. Joaz Banbeck
Post #39 Posted: Tue Jan 27, 2015 9:20 am 
Judan

Posts: 6725
Location: Cambridge, UK
Liked others: 436
Was liked: 3719
Rank: UK 4 dan
KGS: Uberdude 4d
OGS: Uberdude 7d
@Joaz
Does it not make sense that your opponent may overplay or over-extend in a handicap game? You may think his moves are bad, but for them to make no sense to you would require you to be rather stupid, which you don't seem to be. ;-) I mean number 2, he defended a cut. Yeah 3-3 was also possible for sure (but really you have this in joseki books?), but doesn't defending a cut make some sense? Or were you exaggerating for effect?

Top
 Profile  
 
Offline
 Post subject: Re: #250 amatterof v. Joaz Banbeck
Post #40 Posted: Tue Jan 27, 2015 9:47 am 
Judan
User avatar

Posts: 5539
Location: Banbeck Vale
Liked others: 1103
Was liked: 1456
Rank: 1D AGA
GD Posts: 1512
Kaya handle: Test
@Uberdude and observers:
Uberdude wrote:
@Joaz
Does it not make sense that your opponent may overplay or over-extend in a handicap game? You may think his moves are bad, but for them to make no sense to you would require you to be rather stupid, which you don't seem to be. ;-)


Of course, white should probably overplay a bit in a handicap game. But this is only two stones. I could understand a slight overplay at N3, but O3 seems fit for a five-stone handicap.

And note that I have not said that I they are bad. I have said that I don't understand them.
When playing a stronger player I have to assume that he has some deeper purpose that is not immediately obvious to me.


Here is my best guess at what he is planning to do.

If I pincer, he runs, and I must extend from the corner:

Click Here To Show Diagram Code
[go]$$Bc
$$ --------------------------------
$$ | . . . . . . . . . . . . . . . . . . . |
$$ | . . . . . . . . . . . . . . . . . . . |
$$ | . . . O . . . . . . . . . . . . . . . |
$$ | . . . , . . . . . , . . . . . X . . . |
$$ | . . . . . . . . . . . . . . . . . . . |
$$ | . . O . . . . . . . . . . . . . . . . |
$$ | . . . . . . . . . . . . . . . . . . . |
$$ | . . . . . . . . . . . . . . . . . . . |
$$ | . . . . . . . . . . . . . . . . . . . |
$$ | . . . , . . . . . X . . . . . , . . . |
$$ | . . X . . . . . . . . . . . . . . . . |
$$ | . . . . . . . . . . . . . . . . . . . |
$$ | . . . . . . . . . . . . . . . . . . . |
$$ | . . O . . . . . . . . . . . . 3 . . . |
$$ | . . . . X X O . . . . . . 2 . . . . . |
$$ | . . . X . O . O . , 1 . . . . X . . . |
$$ | . . X . . . . . . . . . . O . . . . . |
$$ | . . . . . . . . . . . . . . . . . . . |
$$ | . . . . . . . . . . . . . . . . . . . |
$$ ---------------------------------------[/go]


Then he activates C6 with something like :w4:. I'm not sure exactly where, but he does something in that general area. I reply with :b5: someplace, then he extends with :w6:.

Eventually, he caps my invading stone and goes for a large scale attack:

Click Here To Show Diagram Code
[go]$$Bc
$$ --------------------------------
$$ | . . . . . . . . . . . . . . . . . . . |
$$ | . . . . . . . . . . . . . . . . . . . |
$$ | . . . O . . . . . . . . . . . . . . . |
$$ | . . . , . . . . . , . . . . . X . . . |
$$ | . . . . . . . . . . . . . . . . . . . |
$$ | . . O . . . . . . . . . . . . . . . . |
$$ | . . . . . . . . . . . . . . . . . . . |
$$ | . . . . . . . . . . . . . . . . . . . |
$$ | . . . . . . . . . . . . . . . . . . . |
$$ | . . . , . . . . . X . . . . . , . . . |
$$ | . . X 5 . . . . . . . . . . . . . . . |
$$ | . . . 4 7 . . . . . . . . . . . . . . |
$$ | . . . . . . 6 . . . . . . . . . . . . |
$$ | . . O . . . . . . . 8 c . . . 3 . . . |
$$ | . . . . X X O . . . . . . 2 . . . . . |
$$ | . . . X . O . O . , 1 . a b . X . . . |
$$ | . . X . . . . . . . . . . O . . . . . |
$$ | . . . . . . . . . . . . . . . . . . . |
$$ | . . . . . . . . . . . . . . . . . . . |
$$ ---------------------------------------[/go]


Of course, as I have drawn it, black seems to get out with a-b-c and harasses white's O-file stones. But this is just a general plan.


Addendum: The more I look at G7, the more it seems to be the proper direction for the white group. I have put it - or something in the general area like F8 - on my list of moves to make when I have sente.

_________________
Help make L19 more organized. Make an index: https://lifein19x19.com/viewtopic.php?f=14&t=5207

Top
 Profile  
 
Display posts from previous:  Sort by  
Post new topic Reply to topic  [ 91 posts ]  Go to page Previous  1, 2, 3, 4, 5  Next

All times are UTC - 8 hours [ DST ]


Who is online

Users browsing this forum: No registered users and 1 guest


You cannot post new topics in this forum
You cannot reply to topics in this forum
You cannot edit your posts in this forum
You cannot delete your posts in this forum
You cannot post attachments in this forum

Search for:
Jump to:  
Powered by phpBB © 2000, 2002, 2005, 2007 phpBB Group